5 Ways to Check Graphics Card in Laptop (Windows 11). Have you just bought a new Windows 11 Laptop, and want to check which Graphics card is installed on your Laptop? Then my friend you have come just to the right place. Because this article will show the best 5 ways to check Graphics Card in laptop (Windows 11).
Graphics Card in a Laptop is a hardware component responsible for rendering images, videos, and animations. Graphics Card comes in various models each of them is made for a specific purpose. Some of them are made for playing powerful games and some for professional use like editing. Usually, people don’t think much about the details of the Graphics Card installed on their laptop. But sometimes it is important to check the details because you need to know some of the specifications since if your laptop doesn’t have a powerful Graphics Card. After checking your Graphics Card details, it might help you to know which games or applications your laptop can handle.
So for the same reason, we have written this article 5 Ways to Check Graphics Card in Laptop (Windows 11). So if you want to check your Graphics too then read this article till the end, As we have given 5 ways and each way will provide you with more information than the other one.
5 Ways to Check Graphics Card in Laptop (Windows 11)
Table of Contents


- 1 5 Ways to Check Graphics Card in Laptop (Windows 11)
- 1.1 Method 1: Check the Graphics Card using Windows Settings.
- 1.2 Method 2: Check the Graphics Card using System information tool
- 1.3 Method 3: Check the Graphics Card using DirectX Diagnostic Tools
- 1.4 Method 4: Check the Graphics Card using Device Manager
- 1.5 Method 5: Check the Graphics Card using Task Manager
- 1.6 Bottom Line
Now let’s take a deep look in all of the methods and ways which you can check your Graphics Card in Laptop (Windows 11). You may use any of the method to check your Graphics Card.
Method 1: Check the Graphics Card using Windows Settings.
- First, you have to open Windows settings by clicking Windows + I.
- And click on the Display section.

3. Scroll down and click on the Advance Display option.

4. Then on the next page you will see some information listed there about your Laptop.
5. Then click on Display adaptor properties for Display 1 and there you will find all the information related to your laptop’s Graphics Card.

Method 2: Check the Graphics Card using System information tool
- Press Windows + R from your keyboard.
- And type or copy the code msinfo32
- Then click on the Components section.
- And select the Display option.
- Then you will have all the details and information related to your Laptop’s Graphics Card.
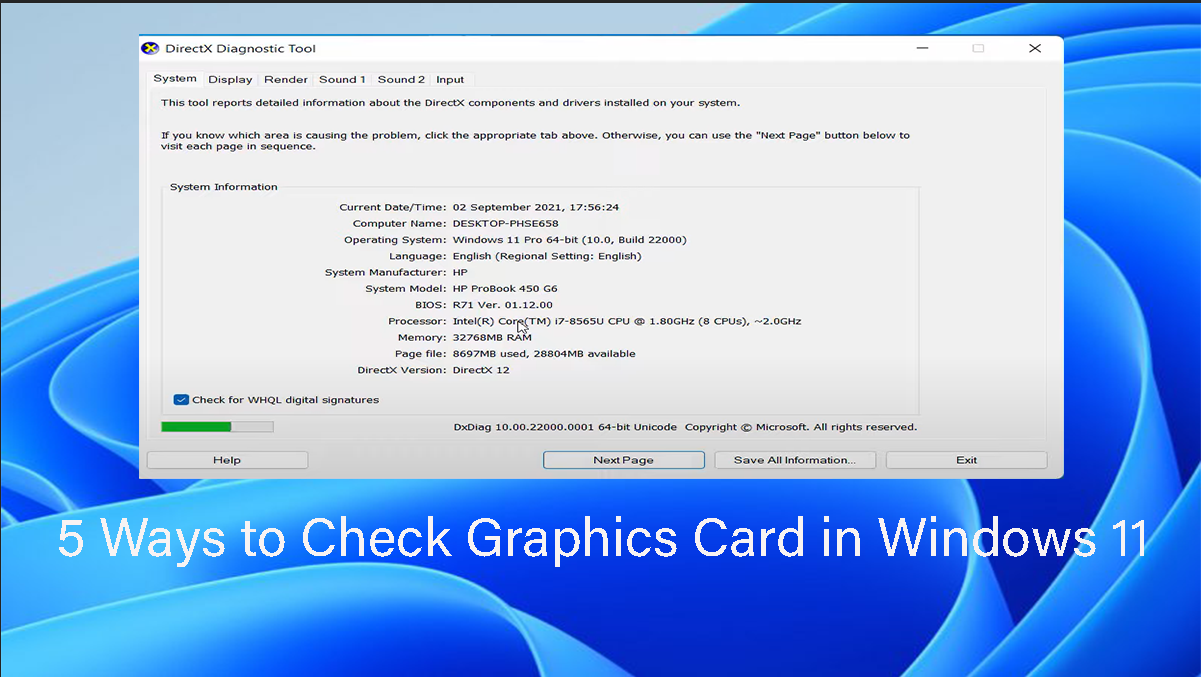
Method 3: Check the Graphics Card using DirectX Diagnostic Tools
- Press Windows + R from your keyboard.
- And type or copy the code dxdiag.

3. Then click on the Display section.
4. And you will have all the information related to your Laptop’s Graphics Card.
Method 4: Check the Graphics Card using Device Manager
- First, open your Laptop’s Startup menu.
- And search for Device Manager and open it.

3. Then click on the Display Adapter option.
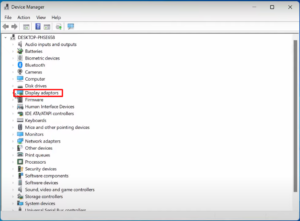
4. And you will have all the details of your Graphics Card.
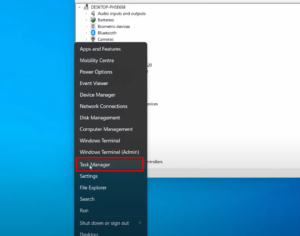
Method 5: Check the Graphics Card using Task Manager
- First, right-click on the Startup menu.
- And select Task Manager from the list.
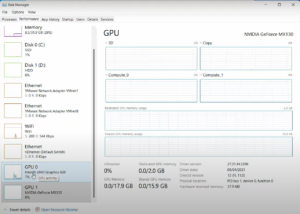
3. Click on the Performance Section.
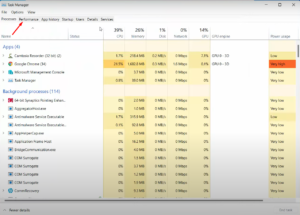
4. And all the details about your Graphics Card will be displayed under GPU 0 and GPU 1.
Bottom Line
In this article, we showed you the best 5 ways to Check Graphics Card in Laptop (Windows 11). I hope you will not face any problem. But if you had any kind of questions or suggestion then do tell us in the comment section.