How to Install macOS Sonoma on VMware on Windows 10/11. So recently Apple released a new operating system for Mac called macOS Sonoma as a replacement for macOS Ventura. MacOS Sonoma has some new improvements, including the ability to place widgets anywhere on your screen. And also enhanced support for Safari to run multiple applications in the background. Mac users were excited to use macOS Sonoma to test their features and enhancement. But macOS Sonoma is still in its beta form, which means it h bugs and errors. So the best way of using macOS Sonoma is on VMware or VirtualBox.
So in this article, we will show you how to install macOS Sonoma on VMware on Windows 10/11. There are various methods of installing macOS Sonoma on VMware such as macOS Sonoma ISO image, Virtual Disk Image like VMDK, or VDI images that come pre-installed with macOS Sonoma. You could also install macOS Sonoma using the Basesystem file. Each of the methods has its own pros and cons.
How to Install macOS Sonoma on VMware on Windows 10/11
Table of Contents
Step 1: Install VMware Workstation
- Click on the installer file and click Yes and Next.
- Click on the box that says I agree the terms in the license agreement.
- Click Next and again Next.
- At last Click Install and Finish.
Step 2: Unlock VMware to install macOS Sonoma
- If you have downloaded macOS Unlocker V3 for VMware GitHub then extract the file. And open that extracted file.
- Right-click on the file win-install.cmd and click run as administrator. Click Yes if you are prompted.
- Then command prompt will be opened and some codes will run, so wait till done.
Step 3: Create and Customize macOS Sonoma VM
- Launch the VMware Workstation and click on Create a New Virtual Machine.


2. Click on Next.

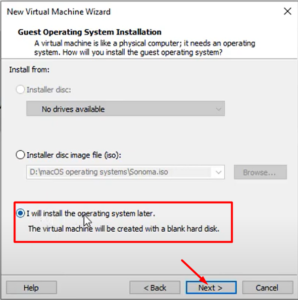
3. Click on the Box that says I will install the operating system later and click on Next.
4. Choose the guest operating system as Apple Mac OS X, then choose the version as macOS 14. Click Next.

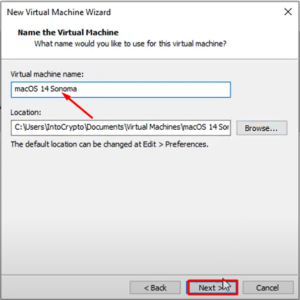
5. Then give your Virtual Machine a name and click Next.
6. Specify the disk and click on the box that says Store Virtual disk as a single file and click Next. The recommend disk size is 80GB.

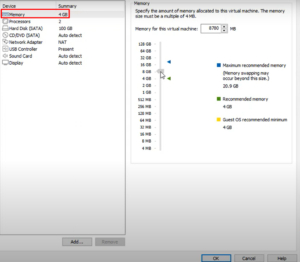
7. On the next page click on Customize Hardware.
8. From the Memory section allocate the amount of RAM. Higher the RAM Higher the performance.
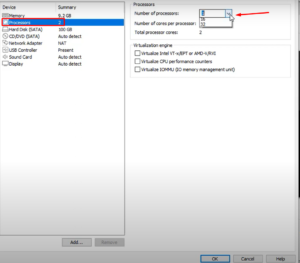
9. From the Processors section increase CPU processor core.
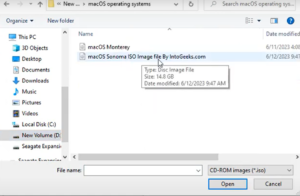
10. Click on the New DVD/CD(SATA) option, click on Use ISO image file, and click on browse.
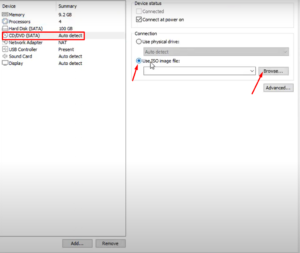
11. Locate the macOS Sonoma ISO image file and click open.
12. Click on Close to save all the changes done.
13. Click Finish.
Step 4: Edit macOS Sonoma VMX file
Remember before that you should start editing macOS Sonoma VMX file. Close the VMware Workstation completely.
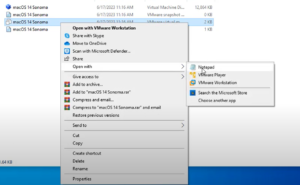
- Find the place where you have saved the macOS Sonoma virtual machine. Click on the file with the extension of VMX file. Open the file with Notepad.
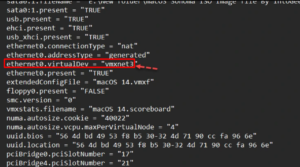
2. Once the file is opened, find the code EthernetO.VirtualDev = “e1000e” and replace “e1000e” with vmxnet3 to fix the internet settings.
3. Then scroll down to the end of the code and insert the code given;

smc.version = “0”
4. Click on File and Click Save.
Step 5 : Power on the Virtual Machine
- Launch the Virtual Machine and select macOS Sonoma VM and click on power on this Virtual Machine.
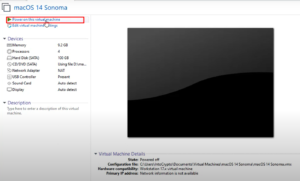
2. Then you will see an Apple logo.
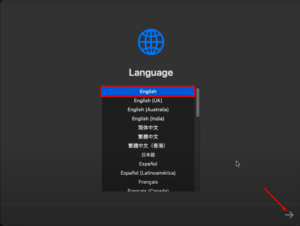
3. Select your Language and click on the arrow icon.
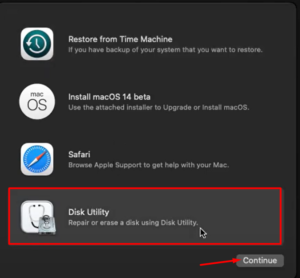
4. Click on Disk Utility>Continue.
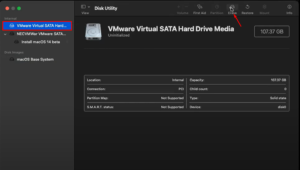
5. Select VMware Virtual SATA hard drive media and click on Erase all.
6. Then give a name to Virtual Machine like macOS Sonoma, select format as Mac OS Extended (journaled), and Scheme as GUID Partition Map.
7. Click Done once finished.
8. Click on the Disk Utility and select quit disk utility.
9. Select Install macOS beta 14 and click on Continue.
10. Once again click Continue.
11. Click Agree and click Agree again.
12.Then select the macOS Sonoma hard disk and click Continue.
Now you have to patiently wait it will take 40 to 1 hour time. It will depend on the speed of your computer. Keep in mind that macOS Sonoma in Virtual Machine will restart several time.
Conclusion
In this article, we showed you how to install macOS Sonoma on Windows 10/11. I hope you will not face any kind of problem. But still if you had any question or suggestion do tell us in the comment section.