
If you have several computers in your work environment, you are probably familiar with the problem of constantly disconnecting and reconnecting USB ports to share devices such as printers, scanners, barcode readers, flash drives, cameras and external hard drives within the network, and you are looking for a hassle-free way to do this. you turn
One of the common ways to solve this problem is to use USB-over-LAN software such as FabulaTech. This software enables sharing of devices connected to a computer via USB port within the local network. However, you may need to use a separate USB hub for this. Here, Raspberry Pi USB to LAN converter hub is used.
By following the simple steps described below, you can share USB peripherals connected to your Raspberry Pi board with other computers via a network cable. Since this process can be a bit difficult for Windows users, we have created a detailed guide to help you convert your Raspberry Pi board into a USB to LAN converter hub.
Most Raspberry Pi single-board computers, except for the Zero family, have four USB ports, so choose one of these boards as the heart of the project. The software that we will use for the project of converting the Raspberry Pi board into a USB hub is very small, so we will only need a microSD card with enough capacity to store the operating system.
Before installing the operating system on the microSD card, you must have flashed it. We’ve used the Raspberry Pi OS here to keep things simple, but you can reduce resource consumption by installing command-line interface (CLI)-based operating systems like DietPi.
The first method: creating a USB hub under the network with VirtualHost
VirtualHost is considered the first method for making a USB to LAN converter hub using a Raspberry Pi board. It’s relatively easy to set up, as all you have to do is:
- After installing Raspberry Pi OS, run the Terminal program. The icon of this software is located at the top of the screen. Additionally, you can select it from the Accessories menu.
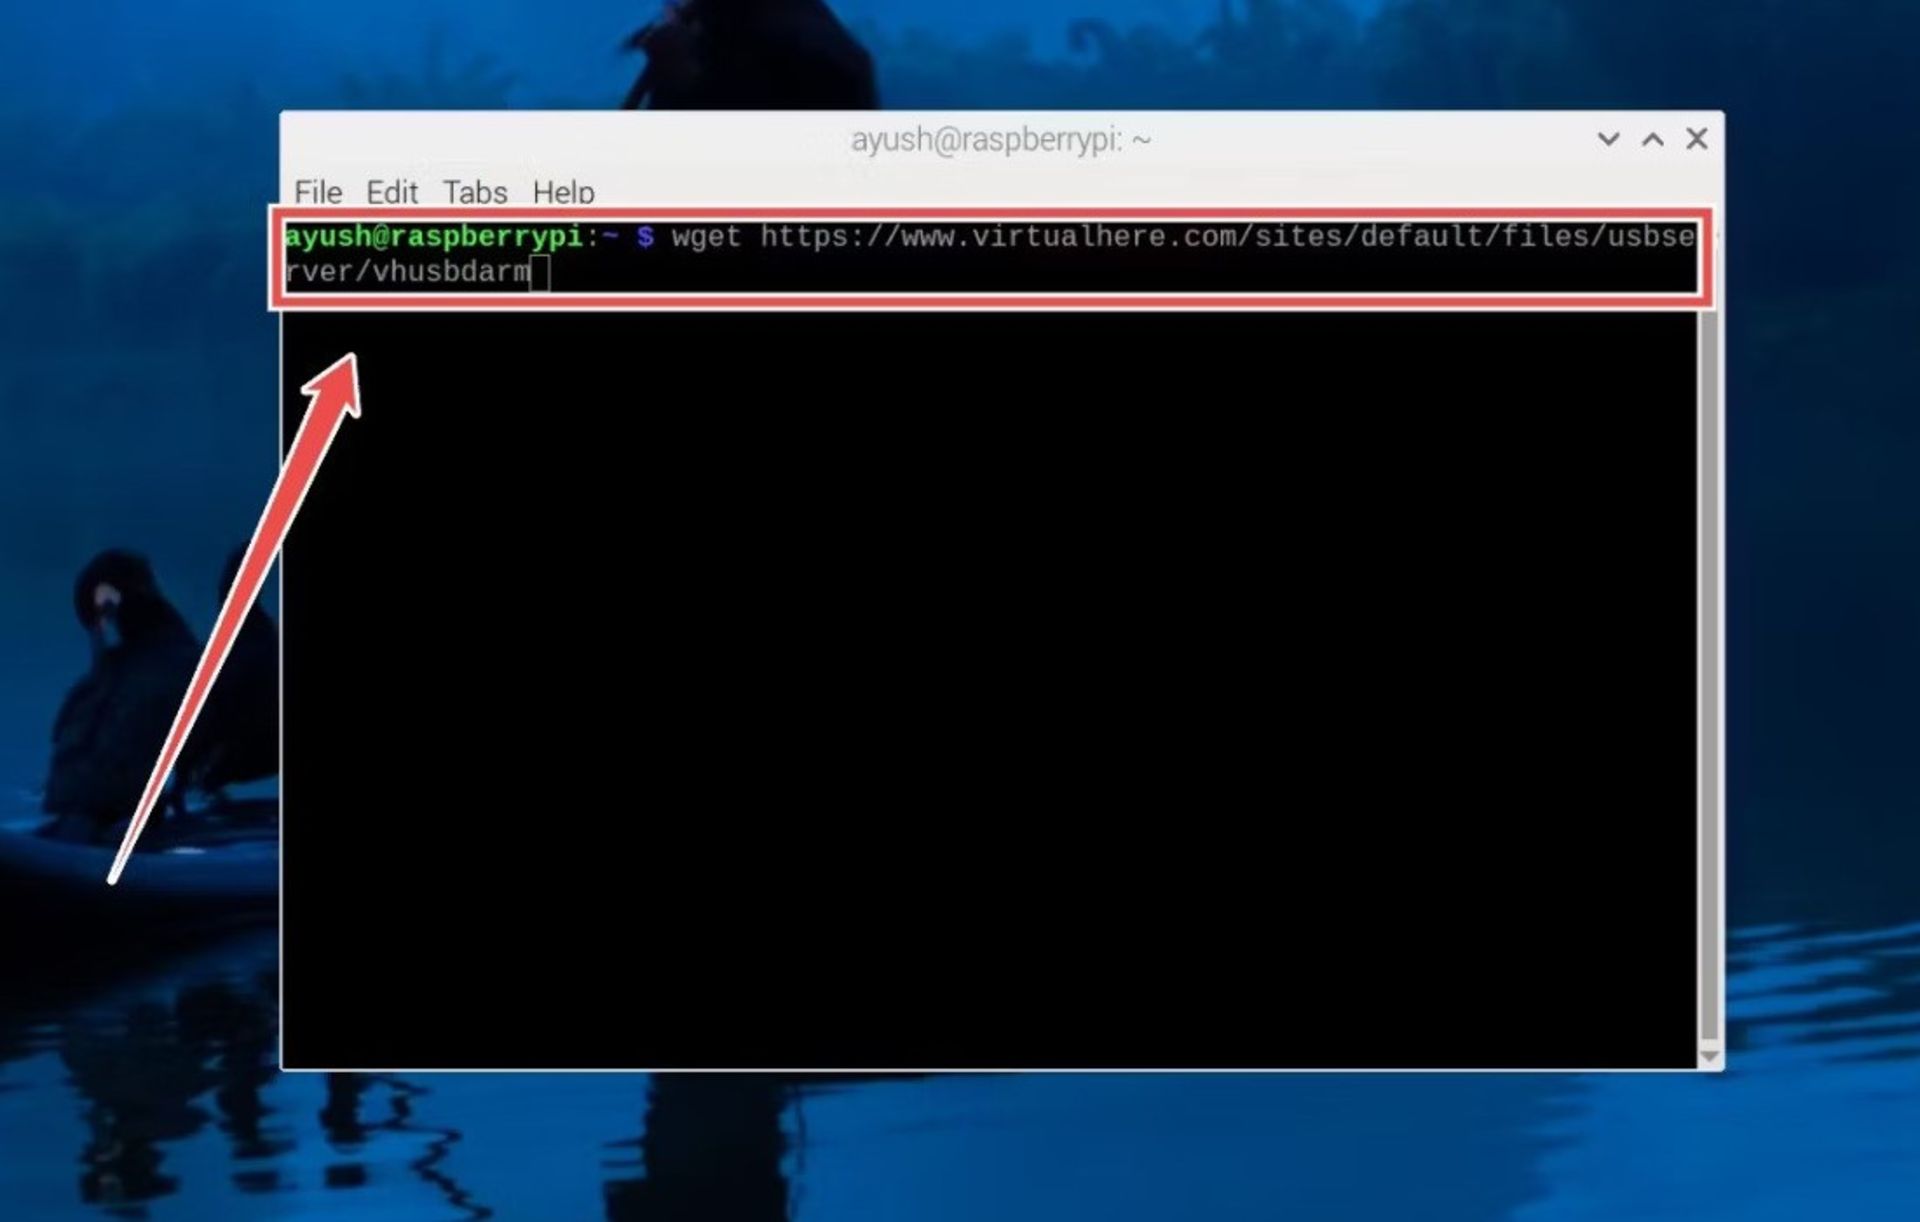
- Use the wget command to download the vhusbdarm package:
wget https://www.virtualhere.com/sites/default/files/usbserver/vhusbdarm
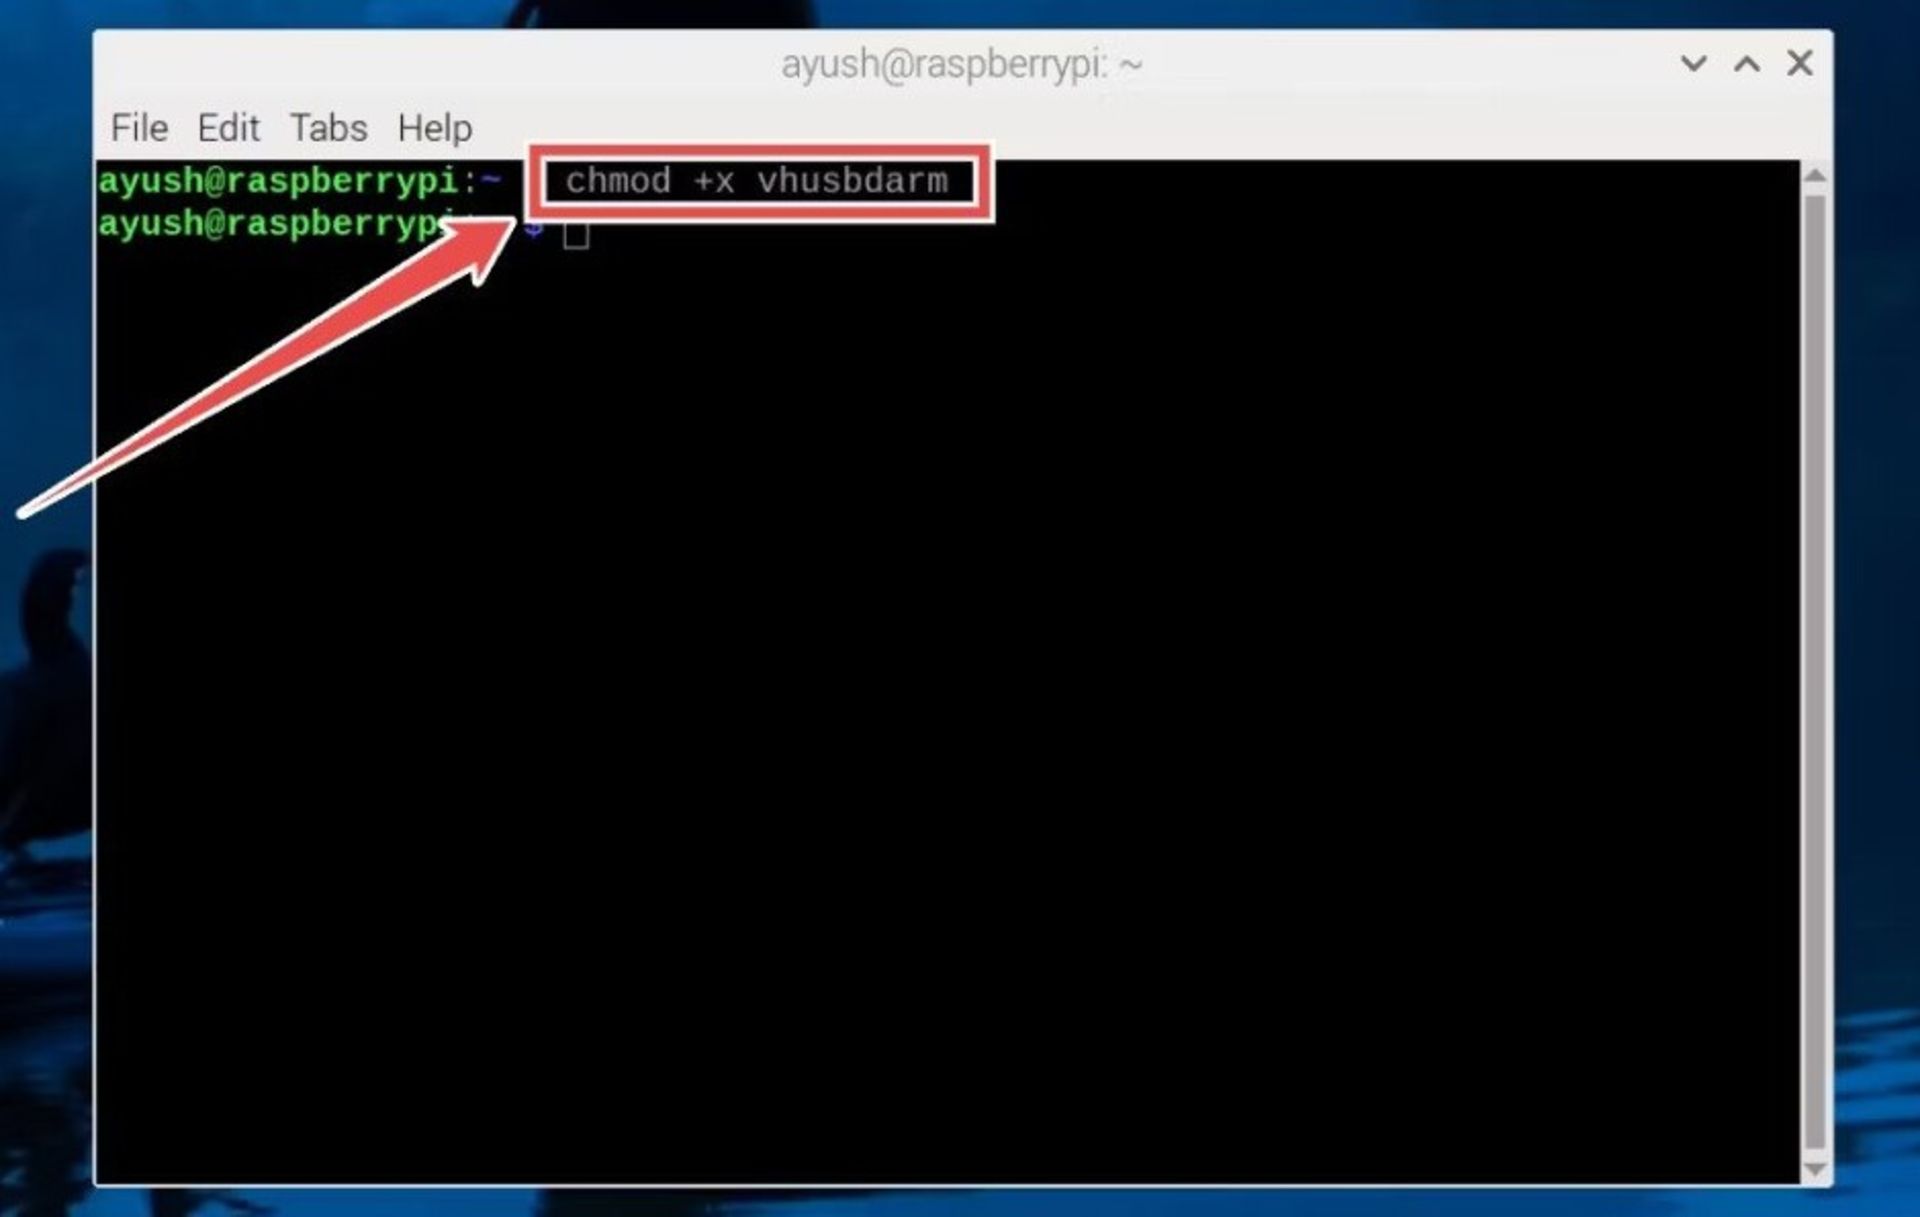
- Modify the permissions of the vhusbdarm file with the chmod command:
- Start the server by running the vhusbdarm script:

- At this point, the Raspberry Pi USB hub is ready. In the next step, you need to set your system as a client.
- Download the VirtualHere Client program from the official link and run it as admin.
- You will see the Raspberry Pi USB Server appear with the USB devices connected to it. You can use the accessory by double-clicking it inside the app.
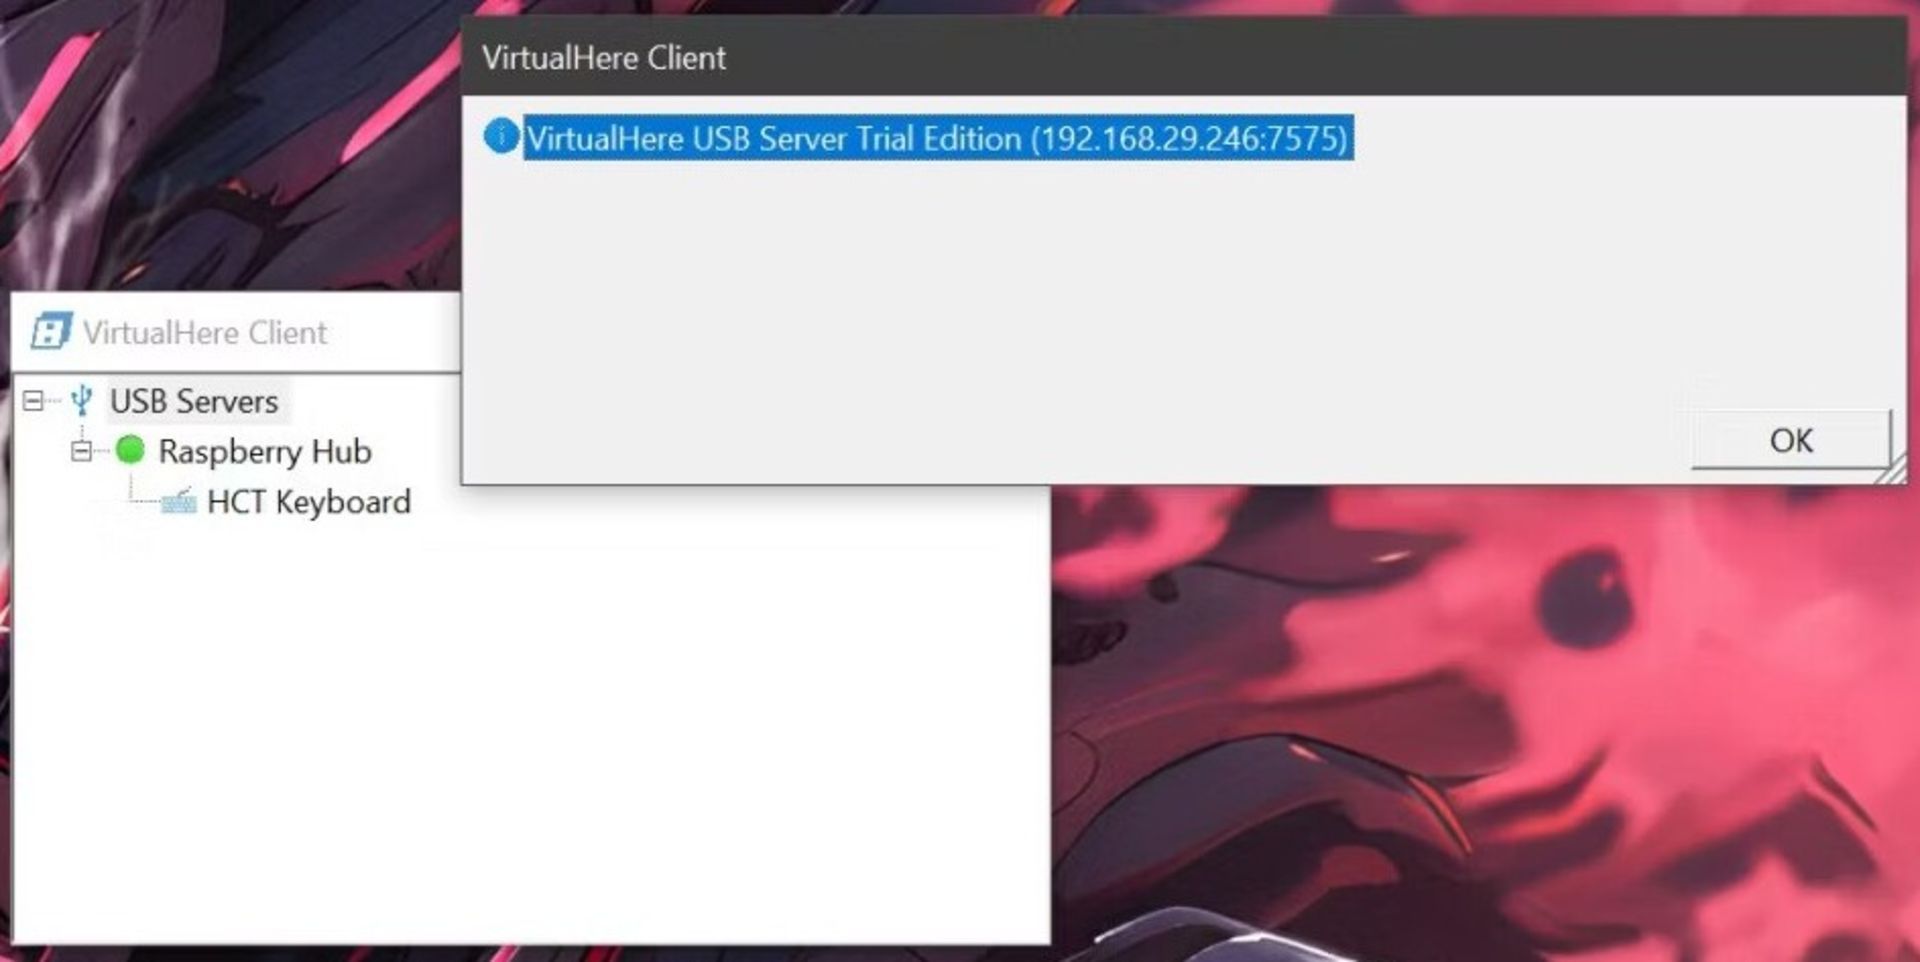
VirtualHere offers a simple way to create this project, but it has some limitations. This app only supports one USB device at a time and you have to pay $49 for a license. It also slows things down a bit, so you might want to go for the second method.
The second method: creating a USB hub under the network through a USB/IP server
A USB/IP server is a way to share USB devices over an IP network. In other words, this server allows devices that are connected to a computer (or hub) through a USB port to communicate with all computers in the network; as if these devices were directly connected to them. Users can easily share devices such as printers, cameras, and external hard drives.
If you have a Linux system or have Windows Subsystem for Linux (WSL) installed on your computer, the USB/IP method will be very simple. However, if you are using a Windows device, the difficulty increases, which we will discuss later.
Configuring the Raspberry Pi board as a USB/IP server
First, you need to install the USB/IP server package on your Raspberry Pi board:
- Inside the Terminal software, install the usbip package using the apt package manager:
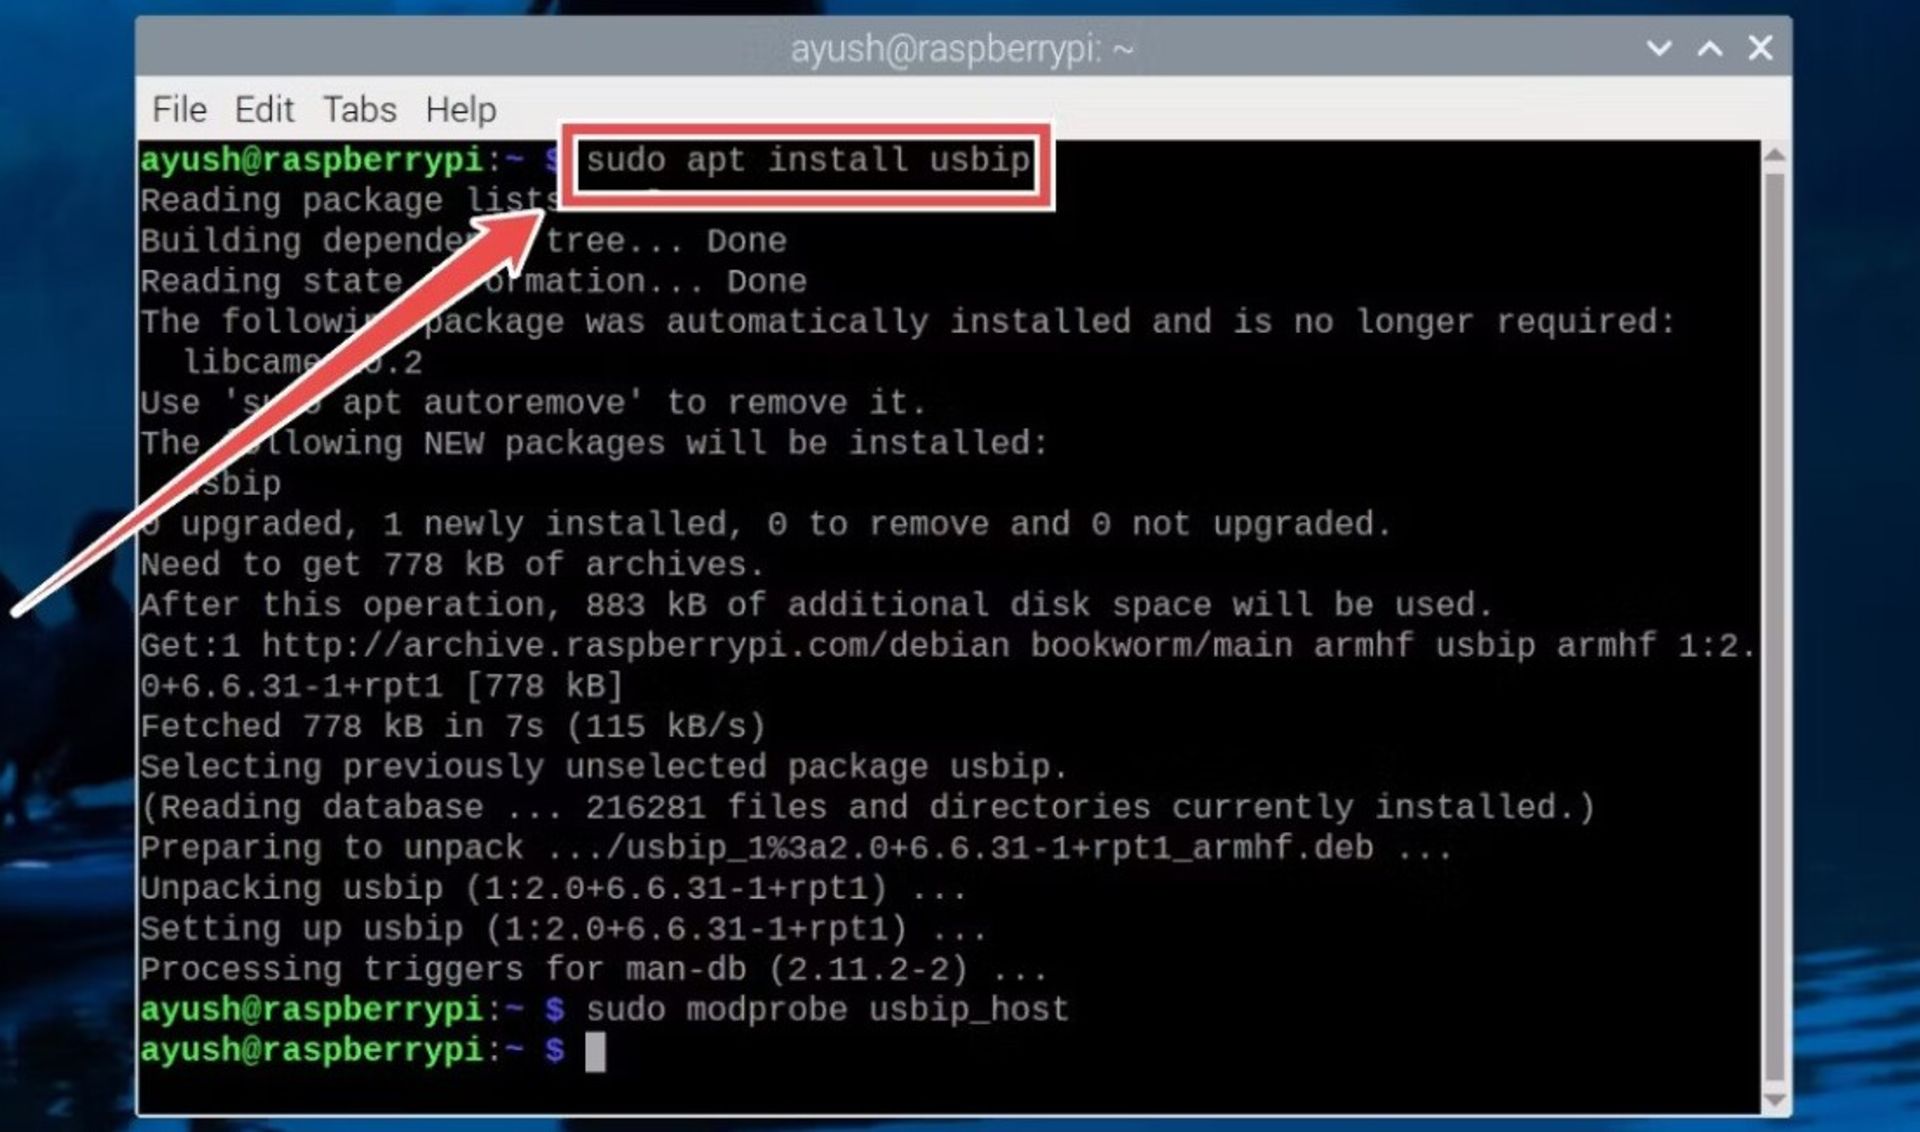
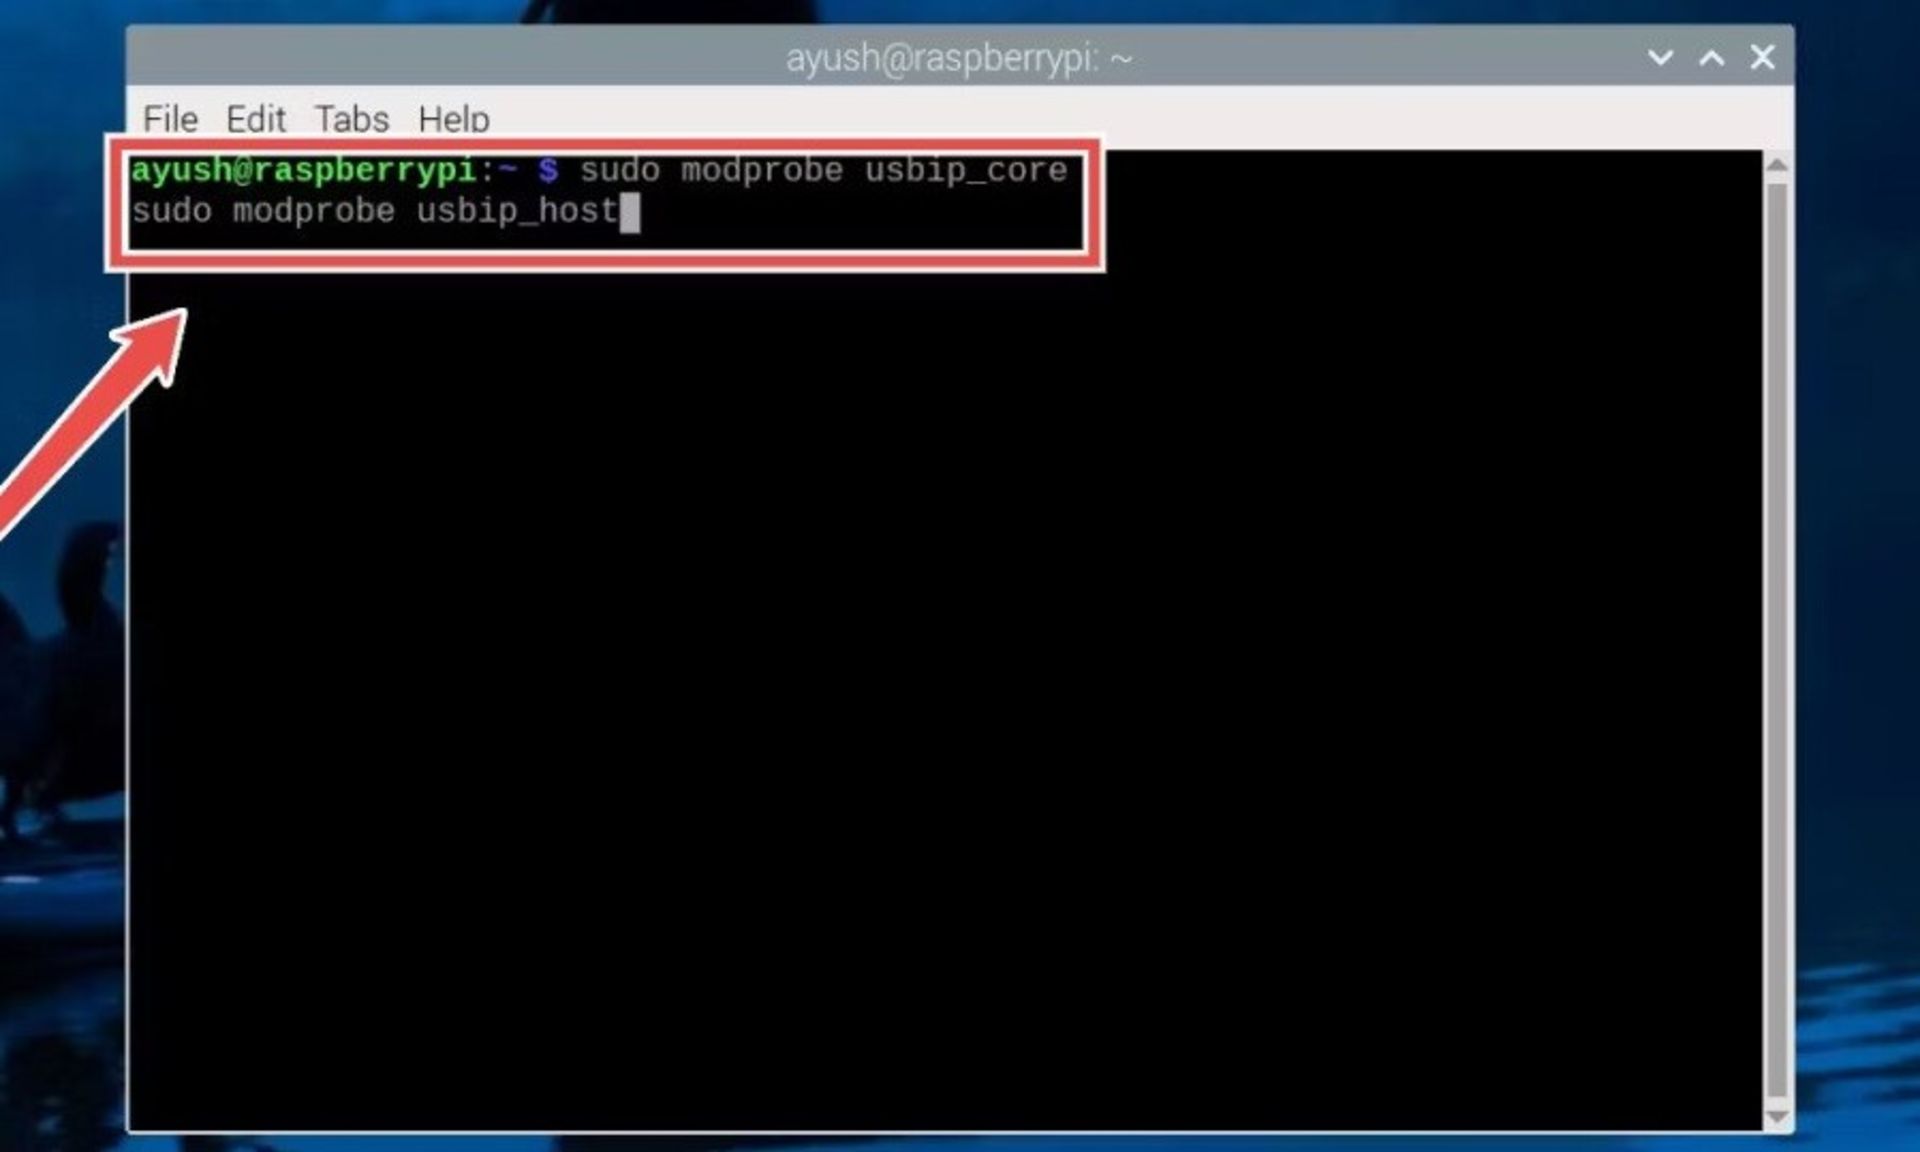
- Load the USB IP host module into the kernel using the modprobe command:
sudo modprobe usbip_core sudo modprobe usbip_host
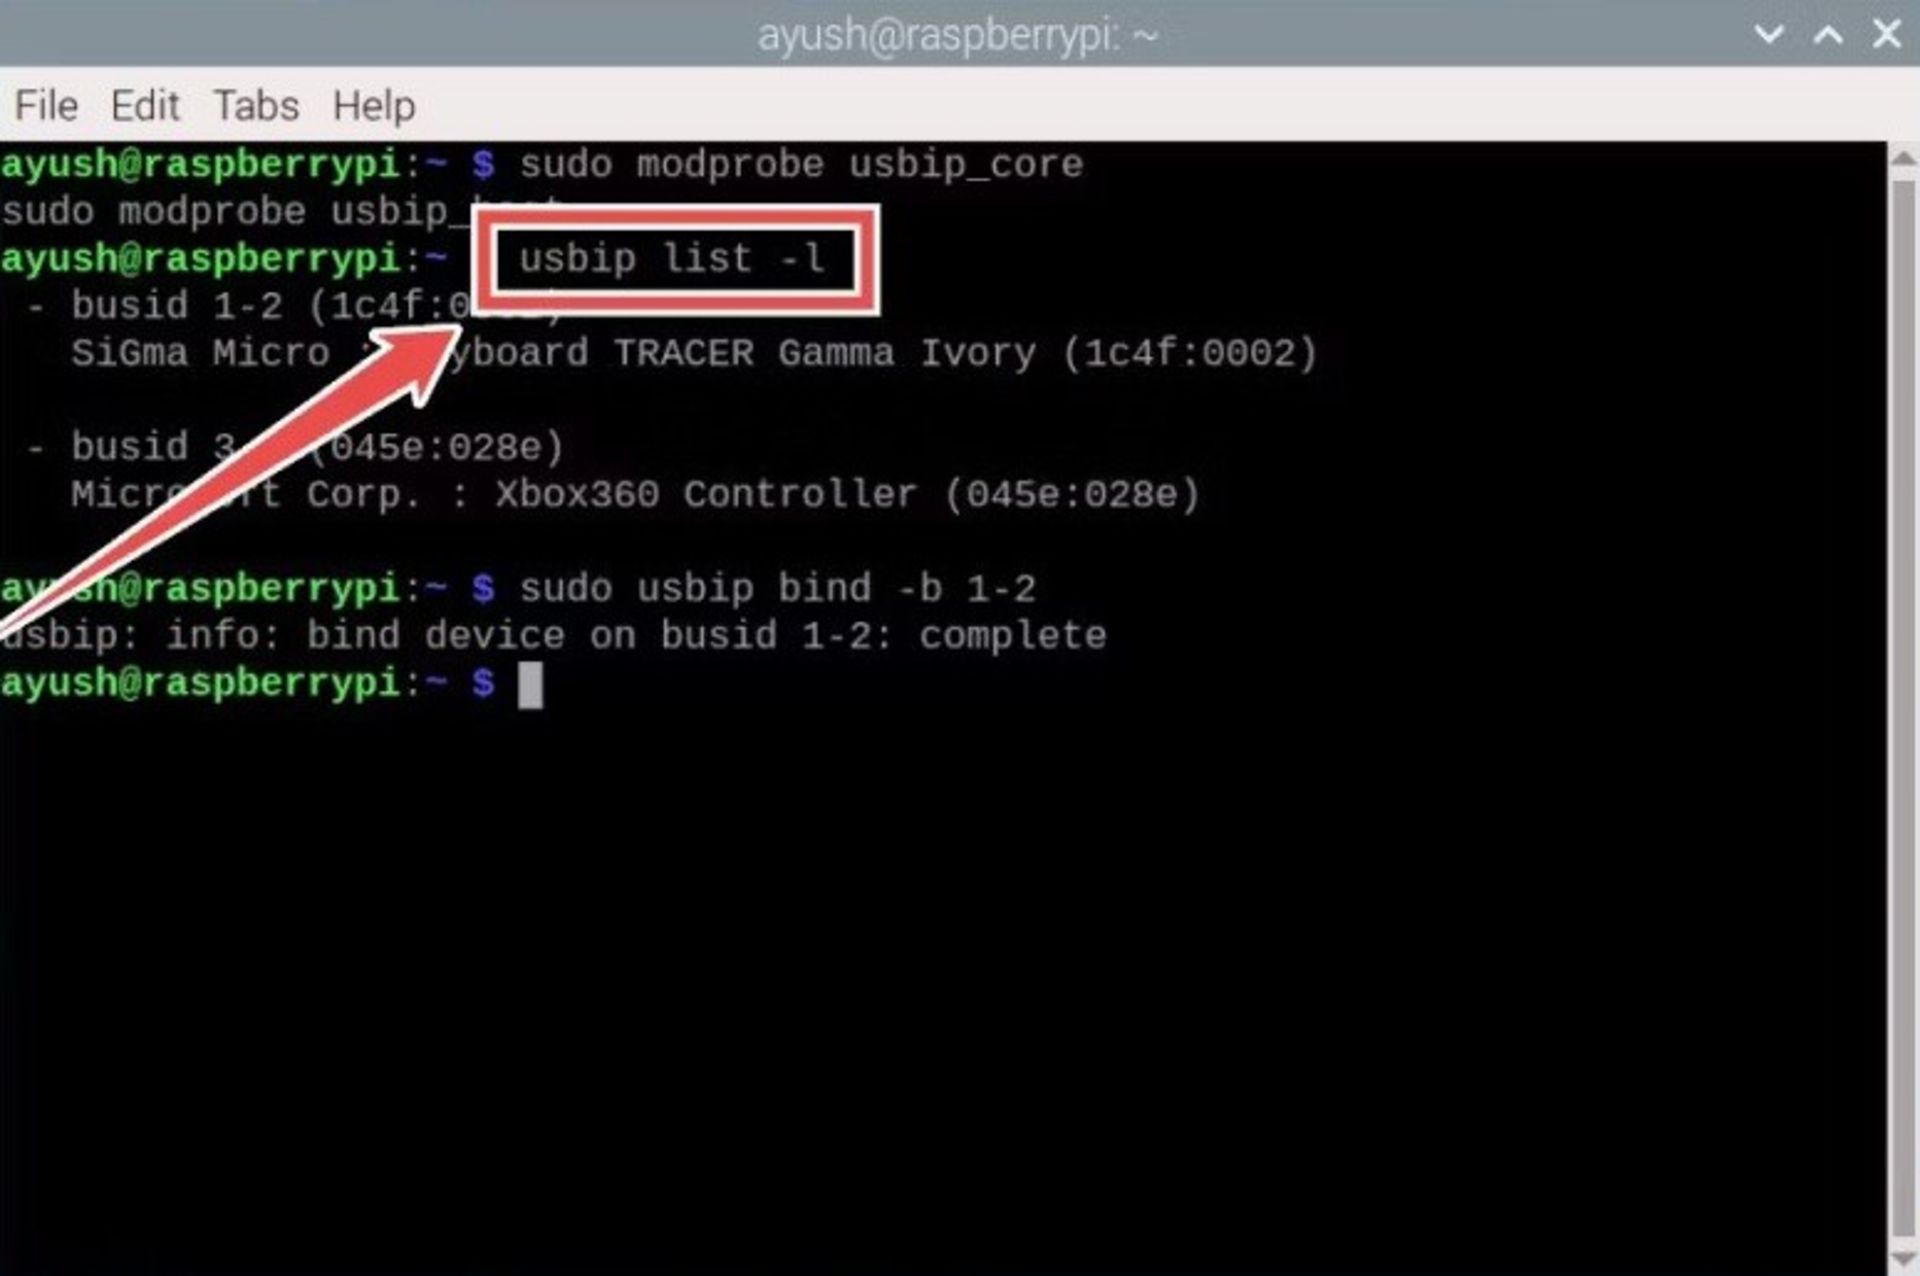
- Check the USB devices connected to the Raspberry Pi board by running the usbip command with the list parameter:
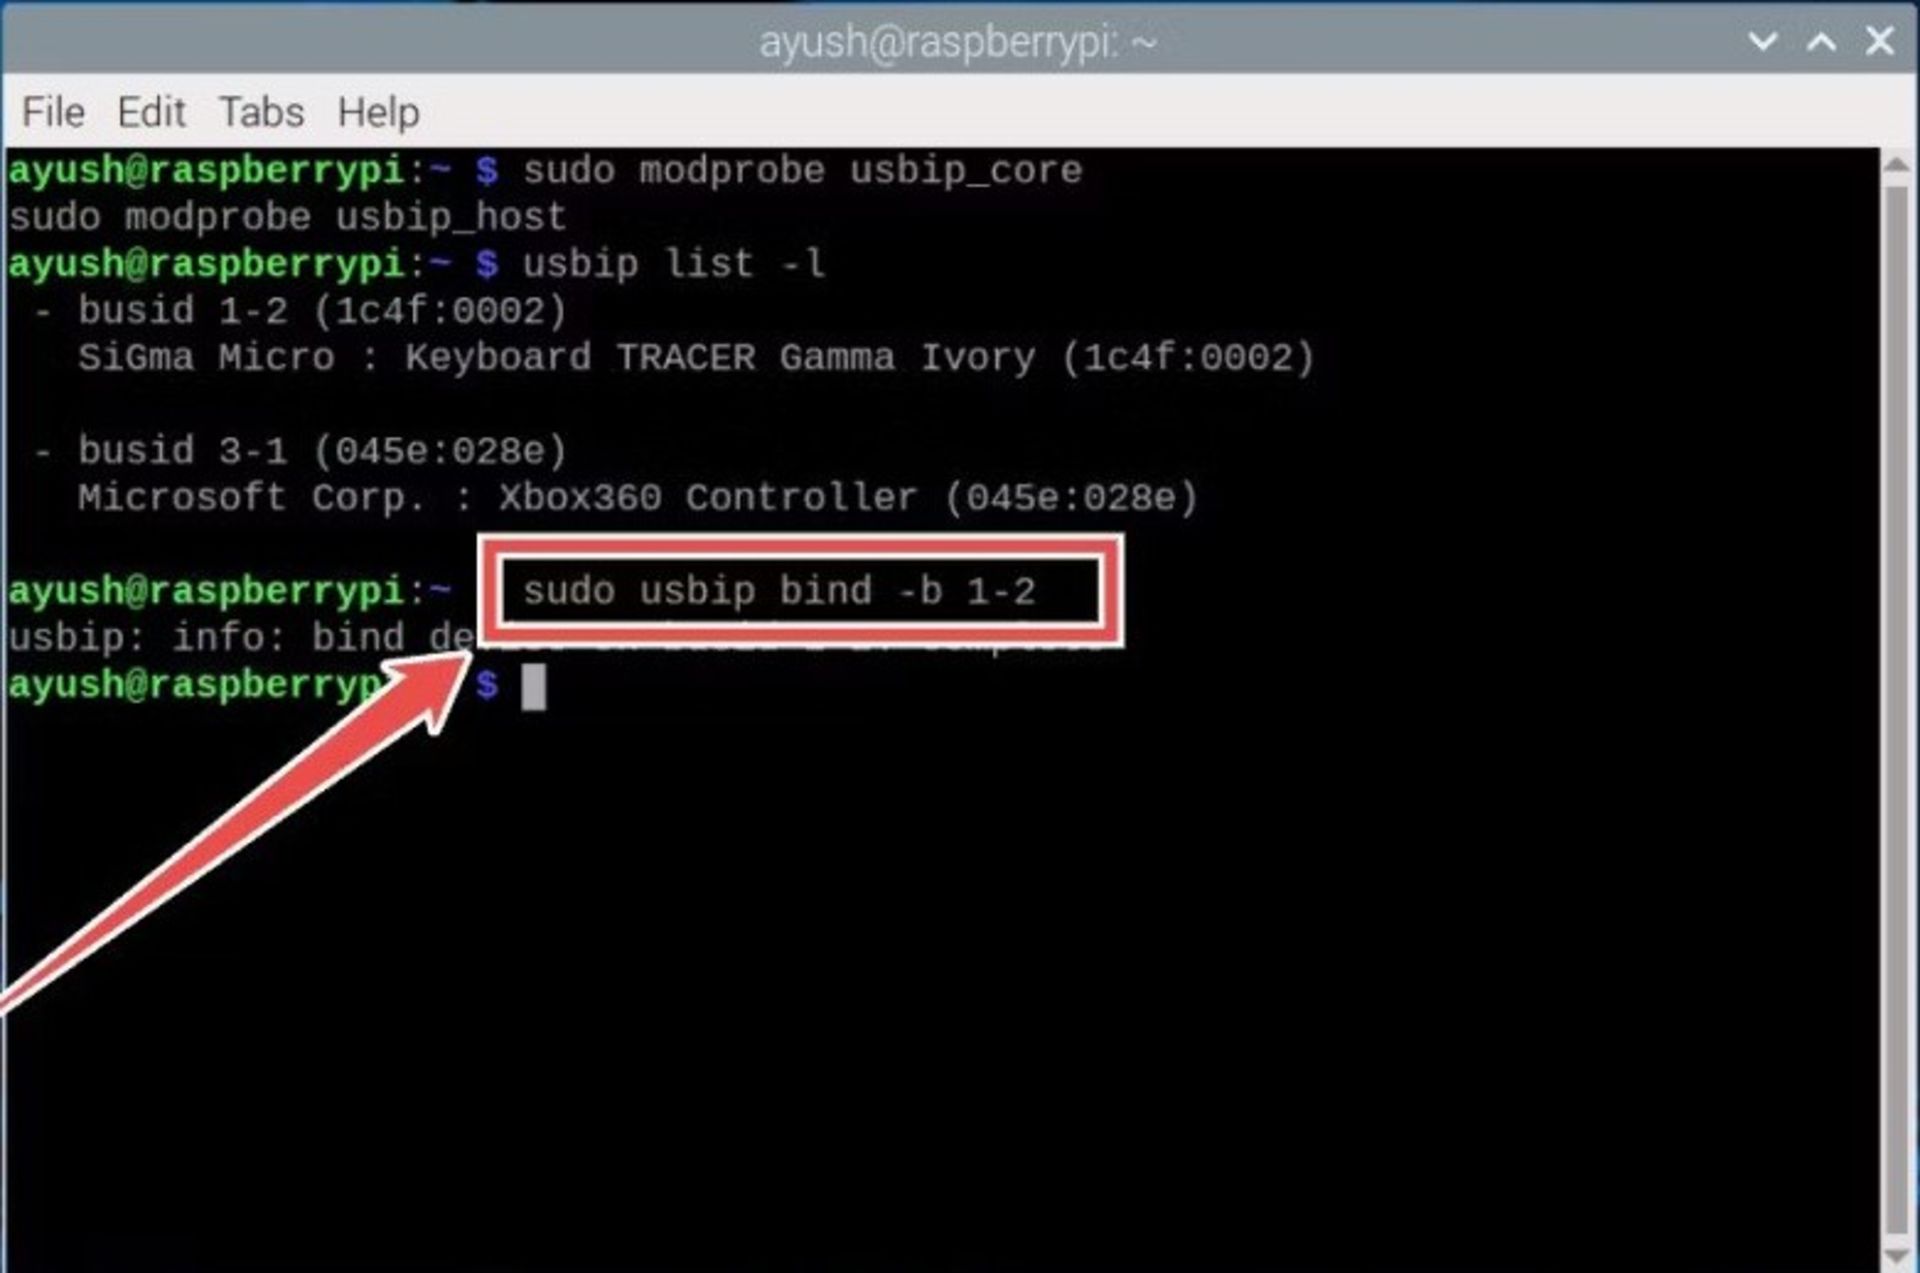
- Enter the bind command along with the bus ID of the device you want to share via LAN:
sudo usbip bind -b usb_id
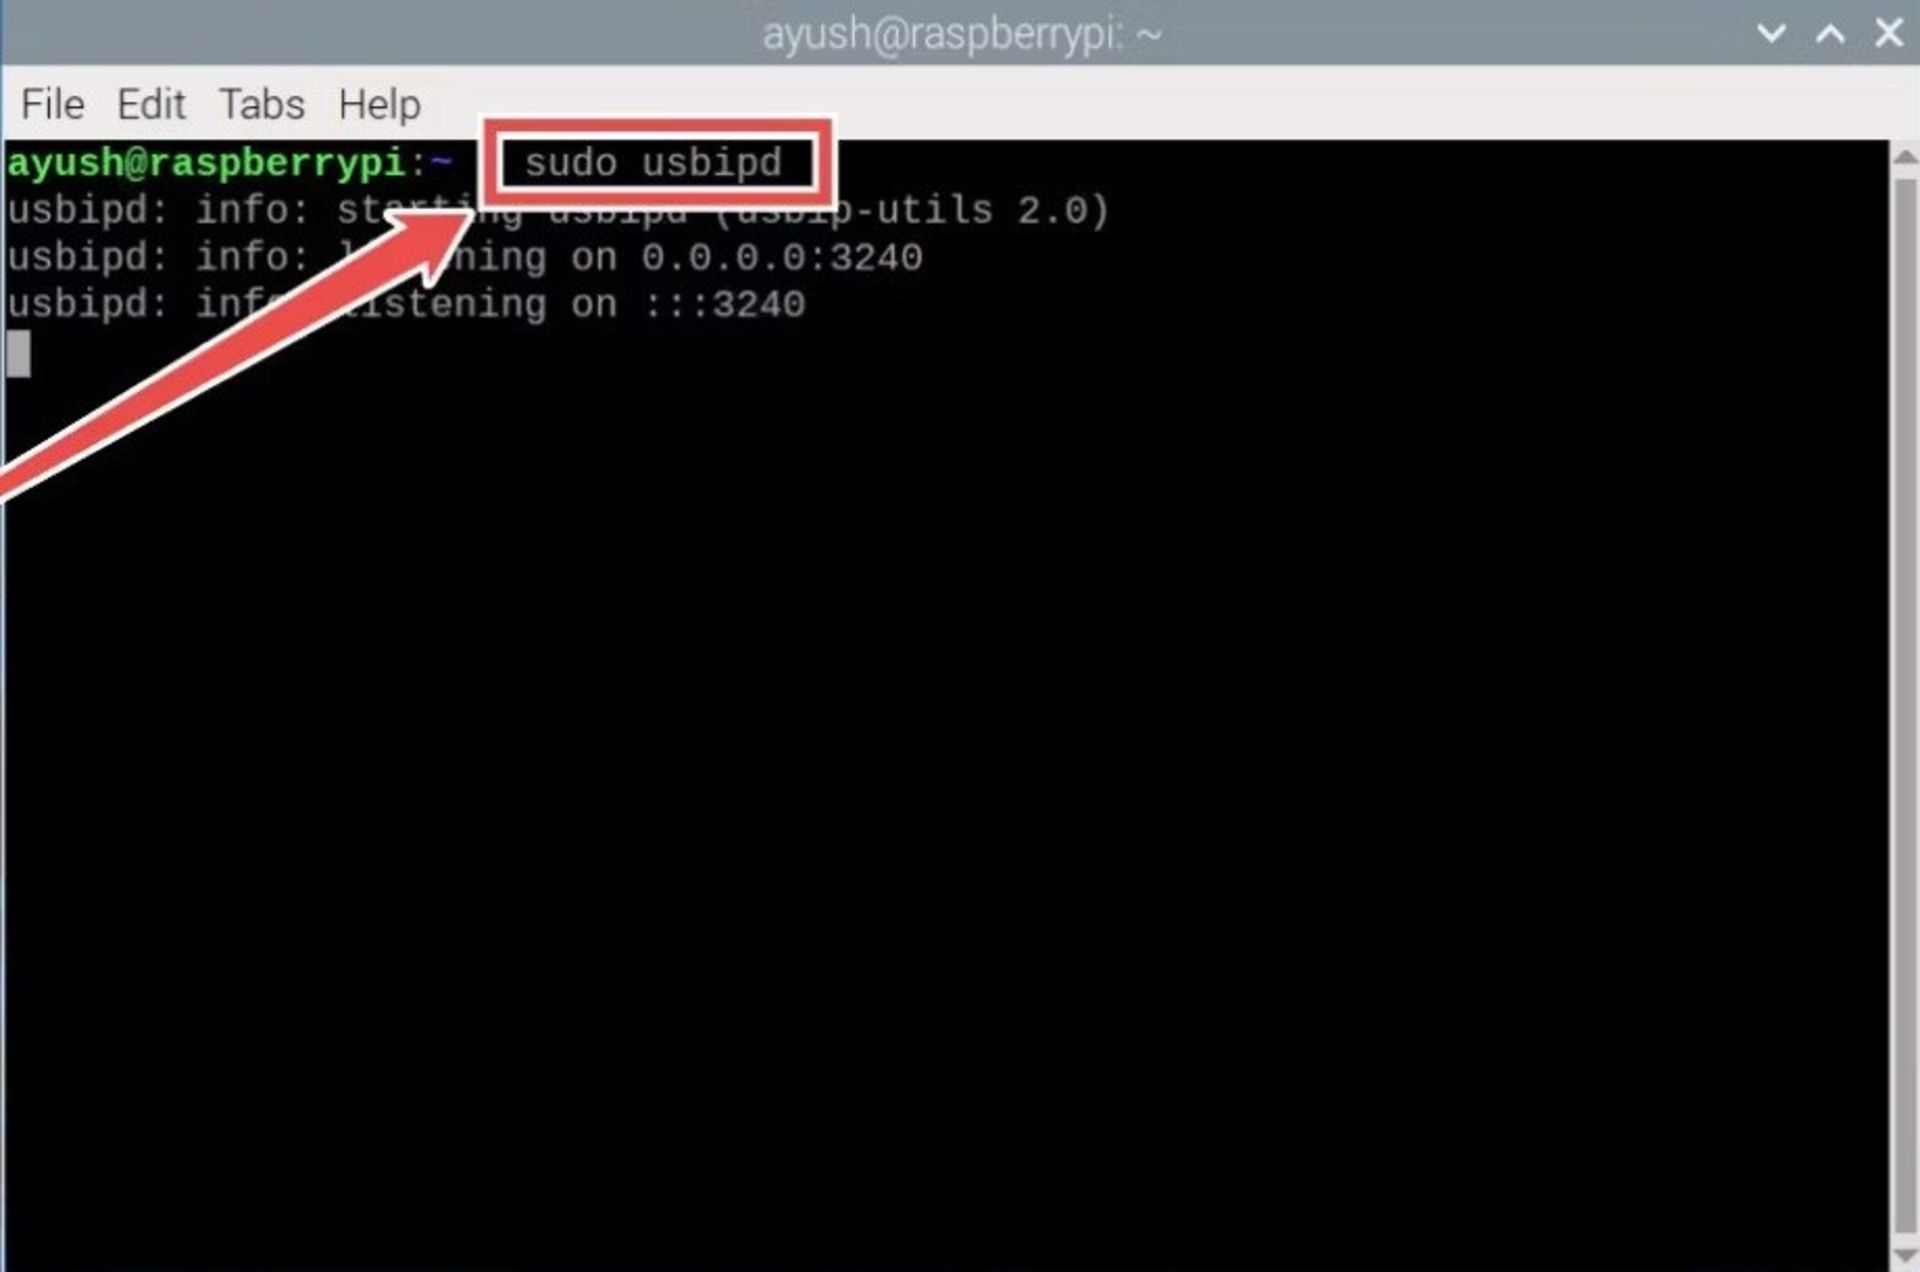
- Start the USB/IP server with this command:
Import USB/IP certificate in Windows
After setting up the USB/IP server, we are done with the Raspberry Pi board and we have to go to the computer. The first step to using USB/IP as a client in Windows is to add its certificate to your operating system.
- Refer to the following link in the GitHub repository and download the Source Code and dev.zip files.
- Unzip both files and open the usbip_test file from inside the driver folder.
- Select the Local Machine option and click Next twice.
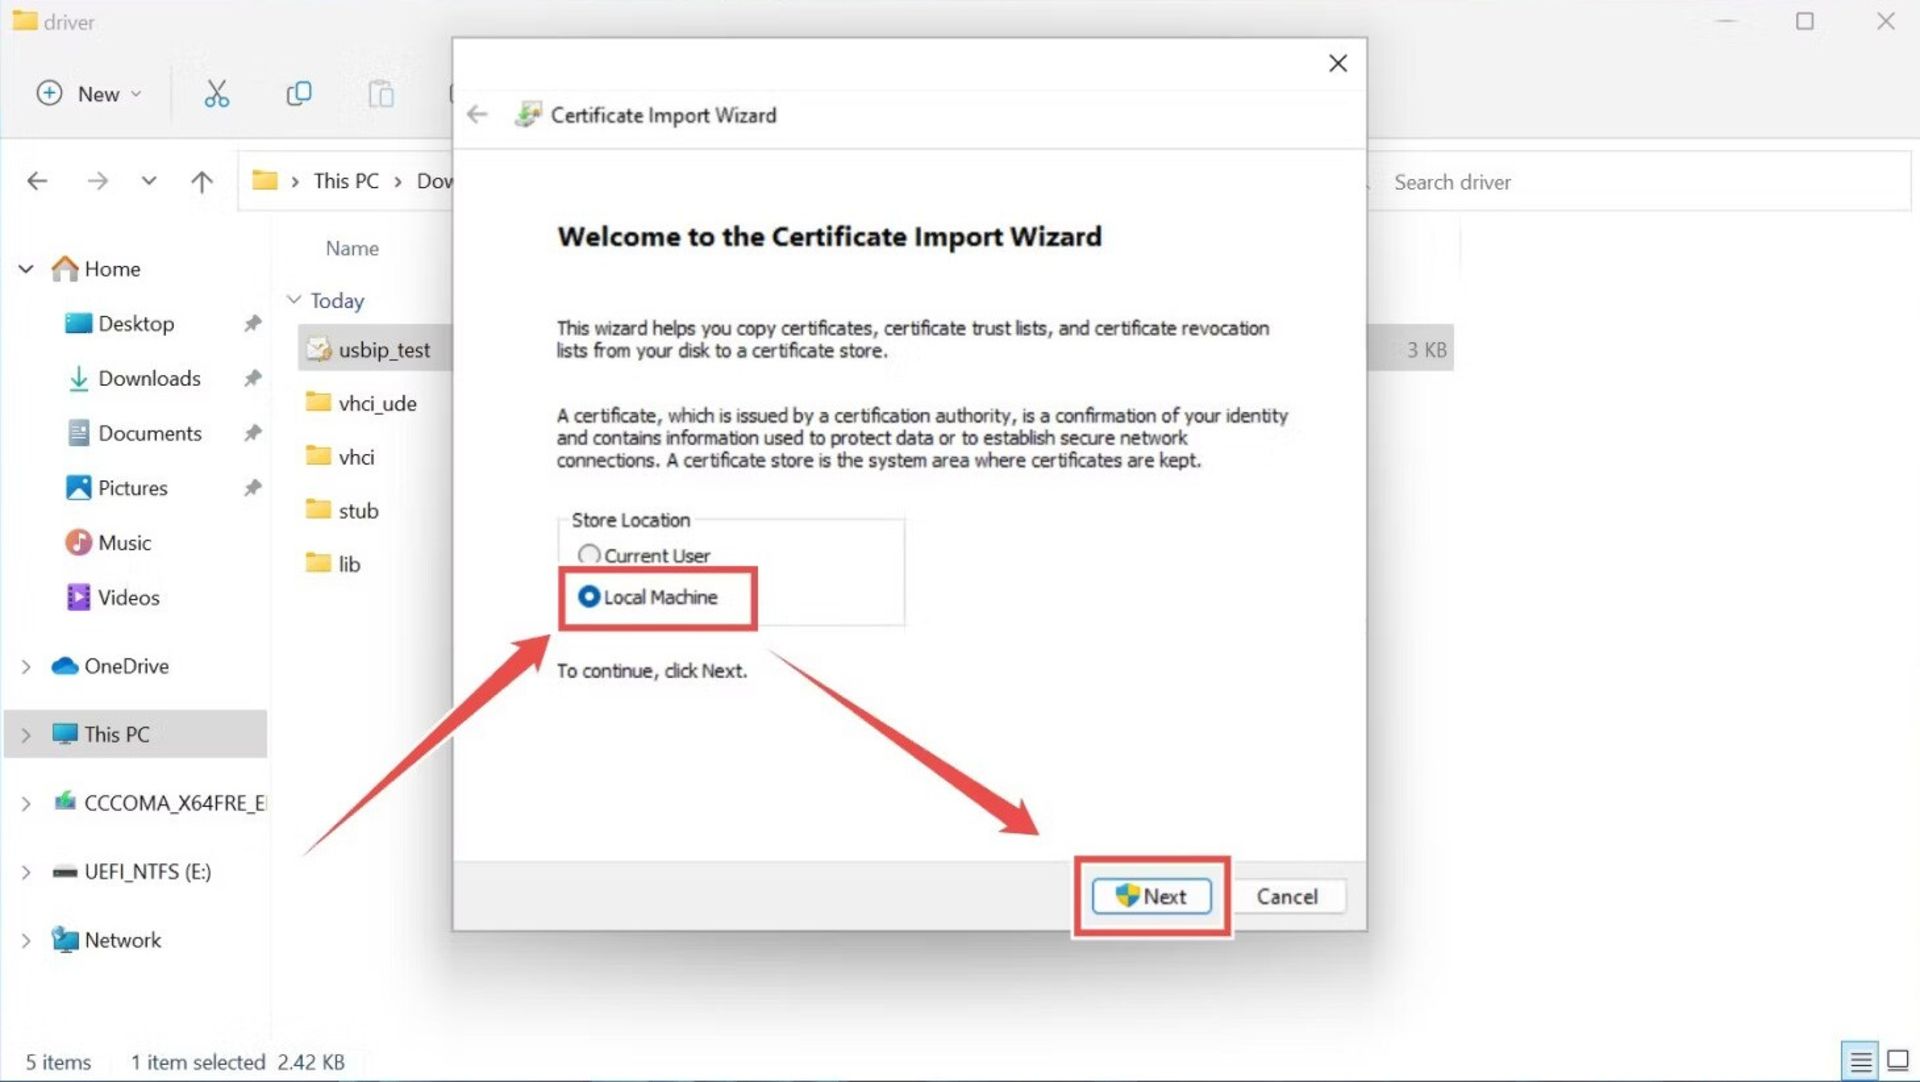
- Enter the word usbip as the password and press the Next button twice.
- Click Finish to exit the Certificate Import Wizard.
Installing USB/IP drivers in Windows 11
After importing the USB/IP certificate, you need to install its drivers. Unfortunately, invalid drivers can only be installed in Test Mode, so you should boot your system in this mode and exit this mode as soon as the drivers are finished installing.
- Right-click on the Start menu in Windows 11 and select Terminal (Admin). (In Windows 10 and lower, use Command Prompt.)
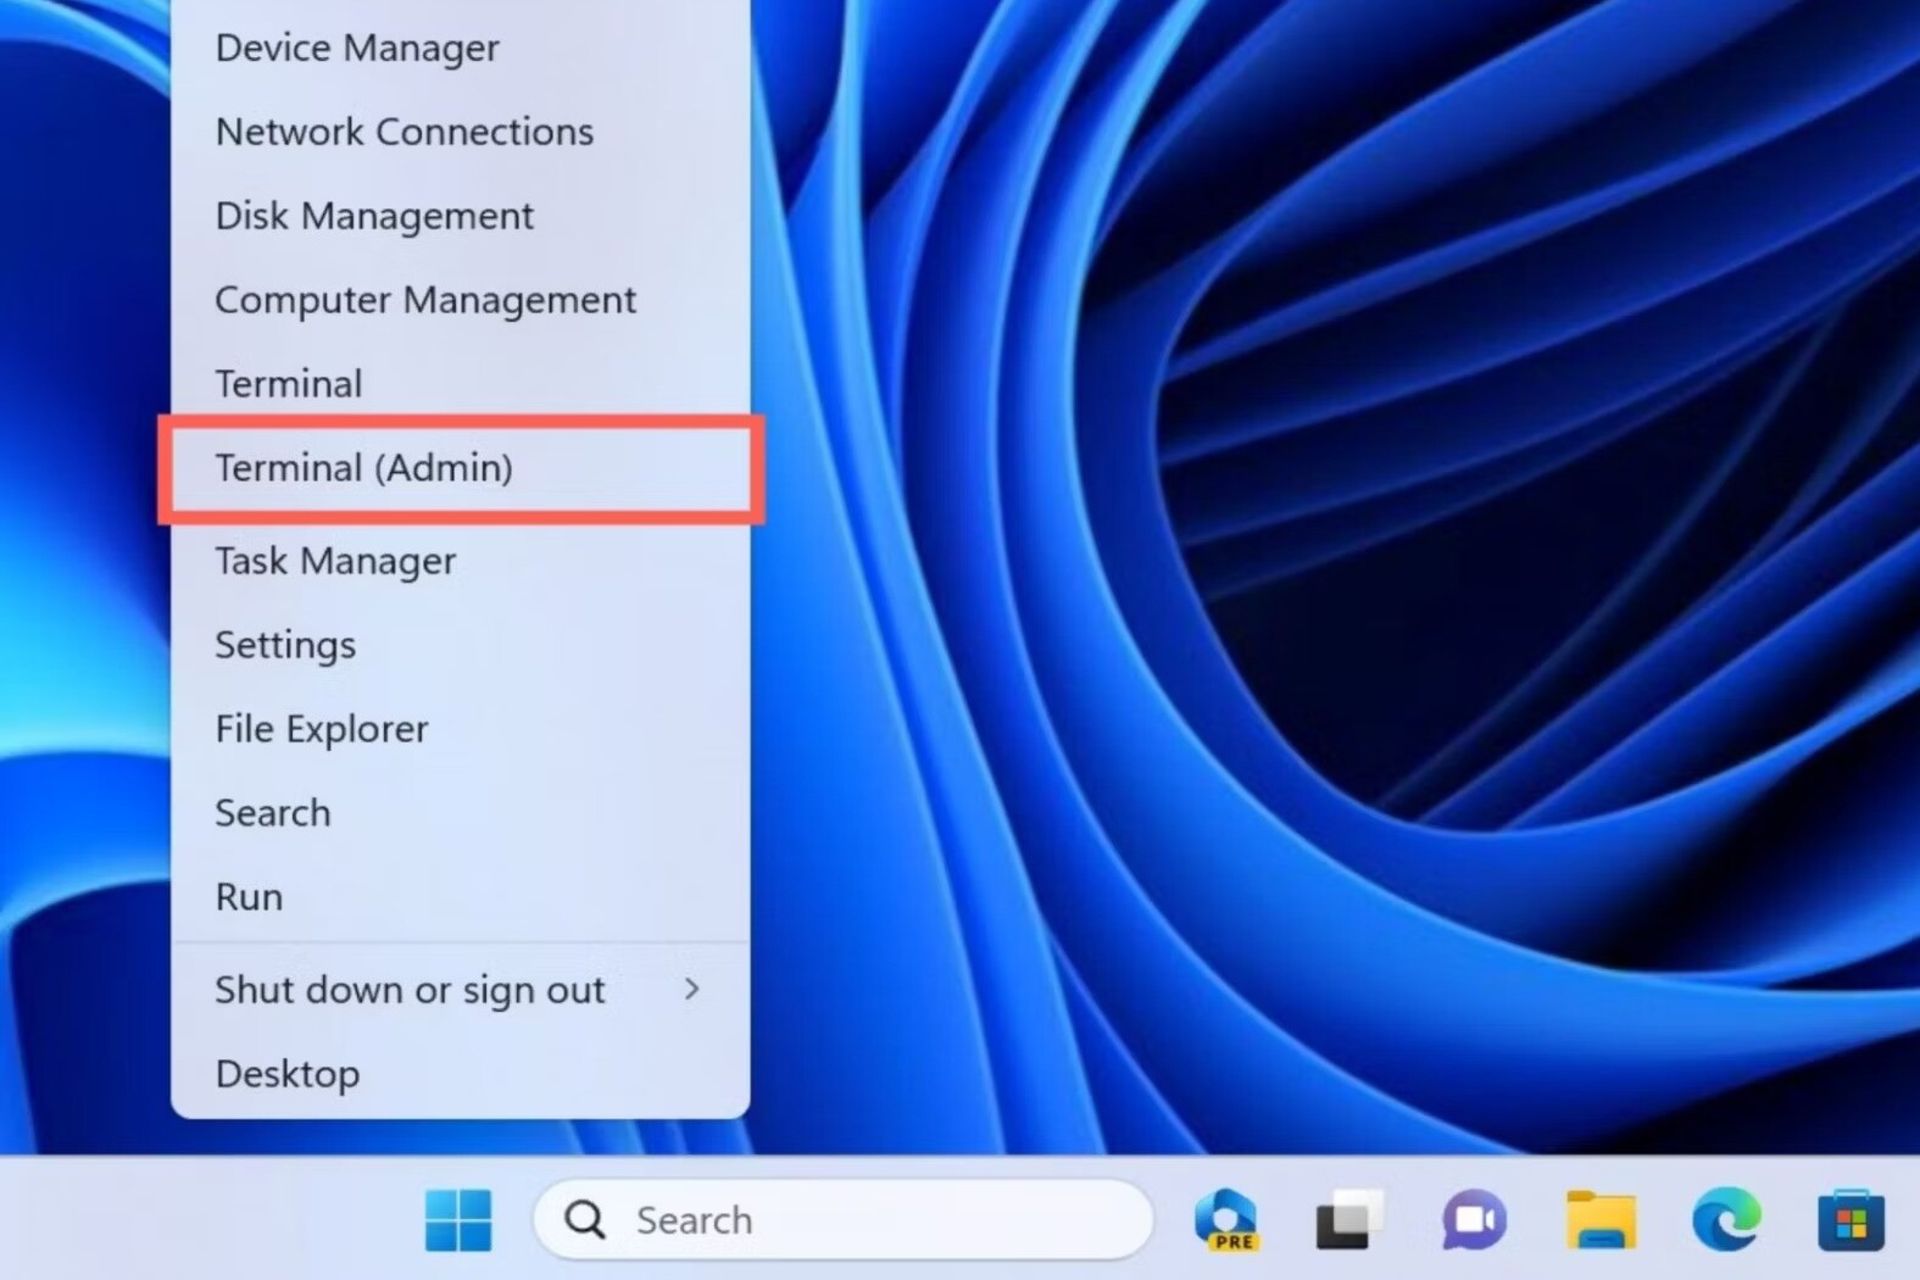
- If the UAC service is requested, give the Terminal admin access.
- Type the following command in the terminal program to enable Test mode on the next startup:
bcdedit.exe /set TESTSIGNING ON
- Restart the system. In this case, you will notice the Test Mode watermark in the lower right corner of the screen.
- Open the Terminal program (or CMD Prompt) again and using the cd command, go to the path where you saved the usbip.exe file.

- Install usbip.exe with the help of the following command:
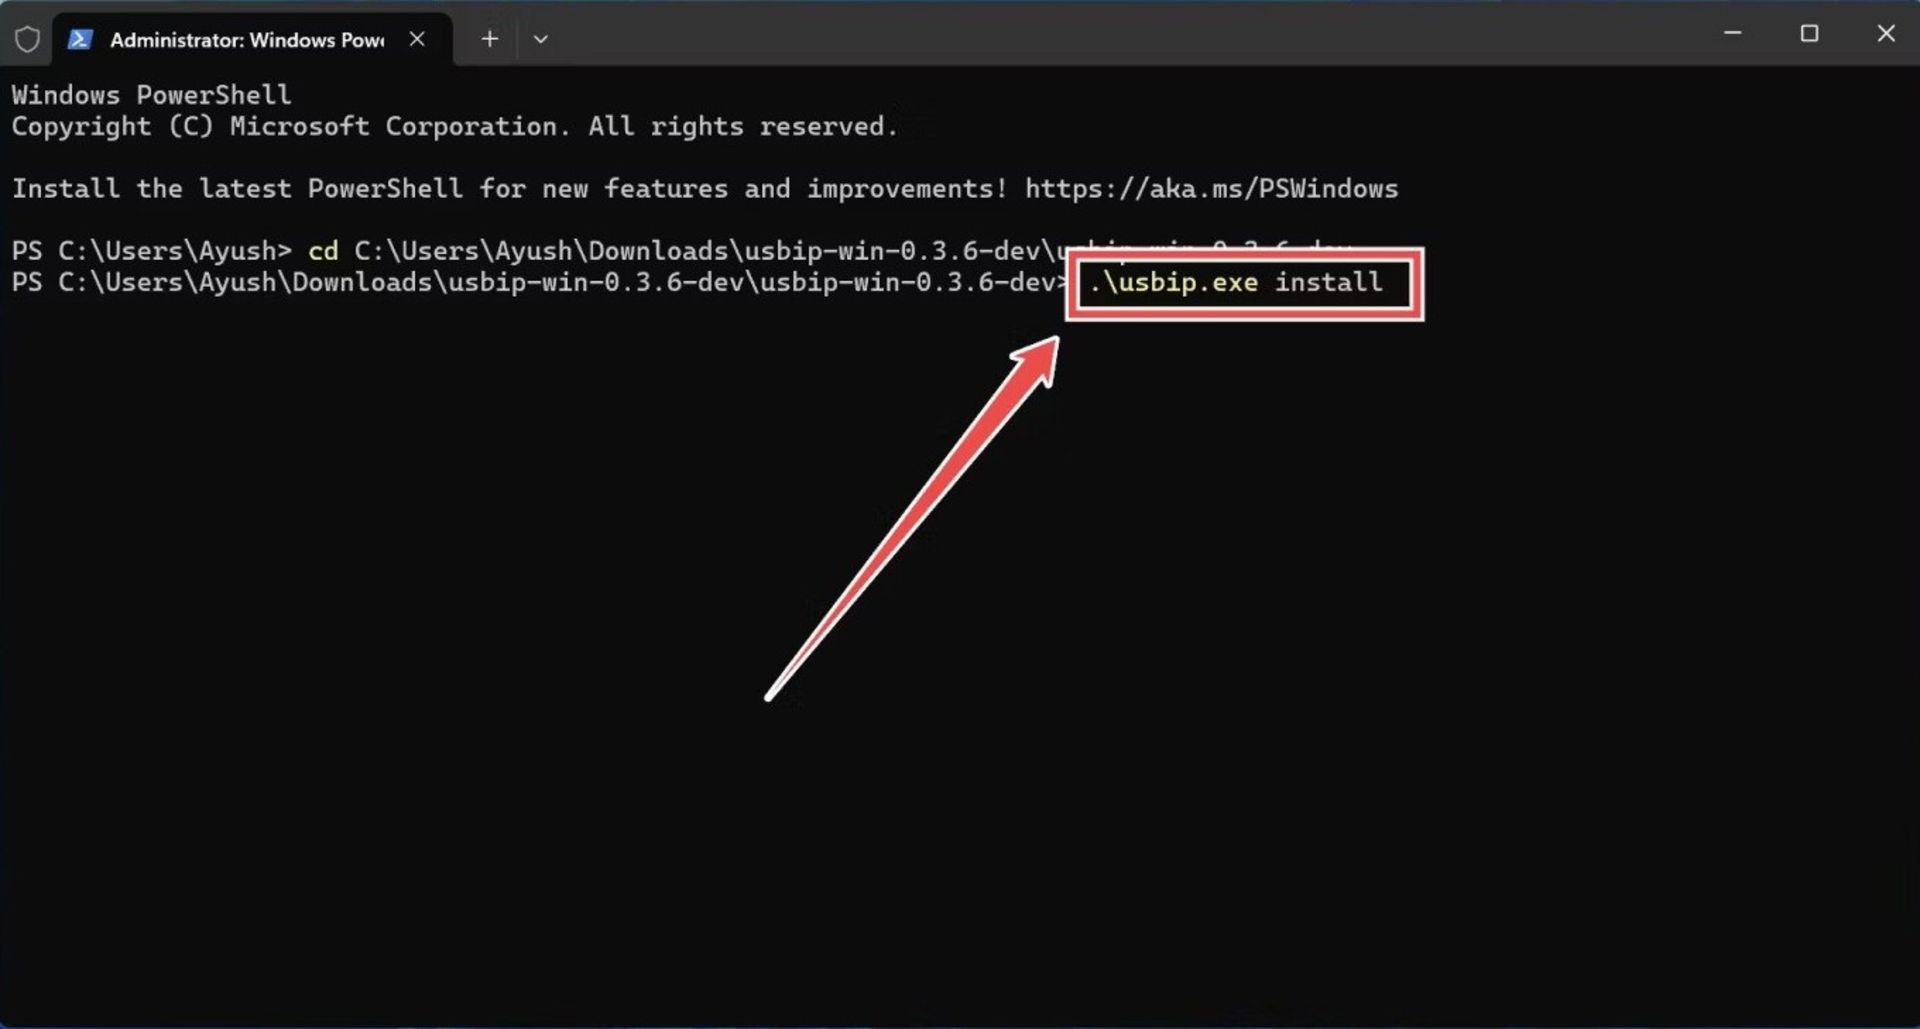
- Before rebooting the system, exit Test Mode by running the following command:
bcdedit.exe /set TESTSIGNING OFF
Connecting the computer to the Raspberry Pi USB/IP server
After restarting the system, you can connect the Raspberry Pi server to the computer as a USB hub and connect USB devices to each other through the LAN network.
- Open the Terminal software (or CMD Prompt).
- Go again to the USB/IP file path and usbip.exe with the parameter list run
usbip.exe list -r raspberry_pi_ip_address
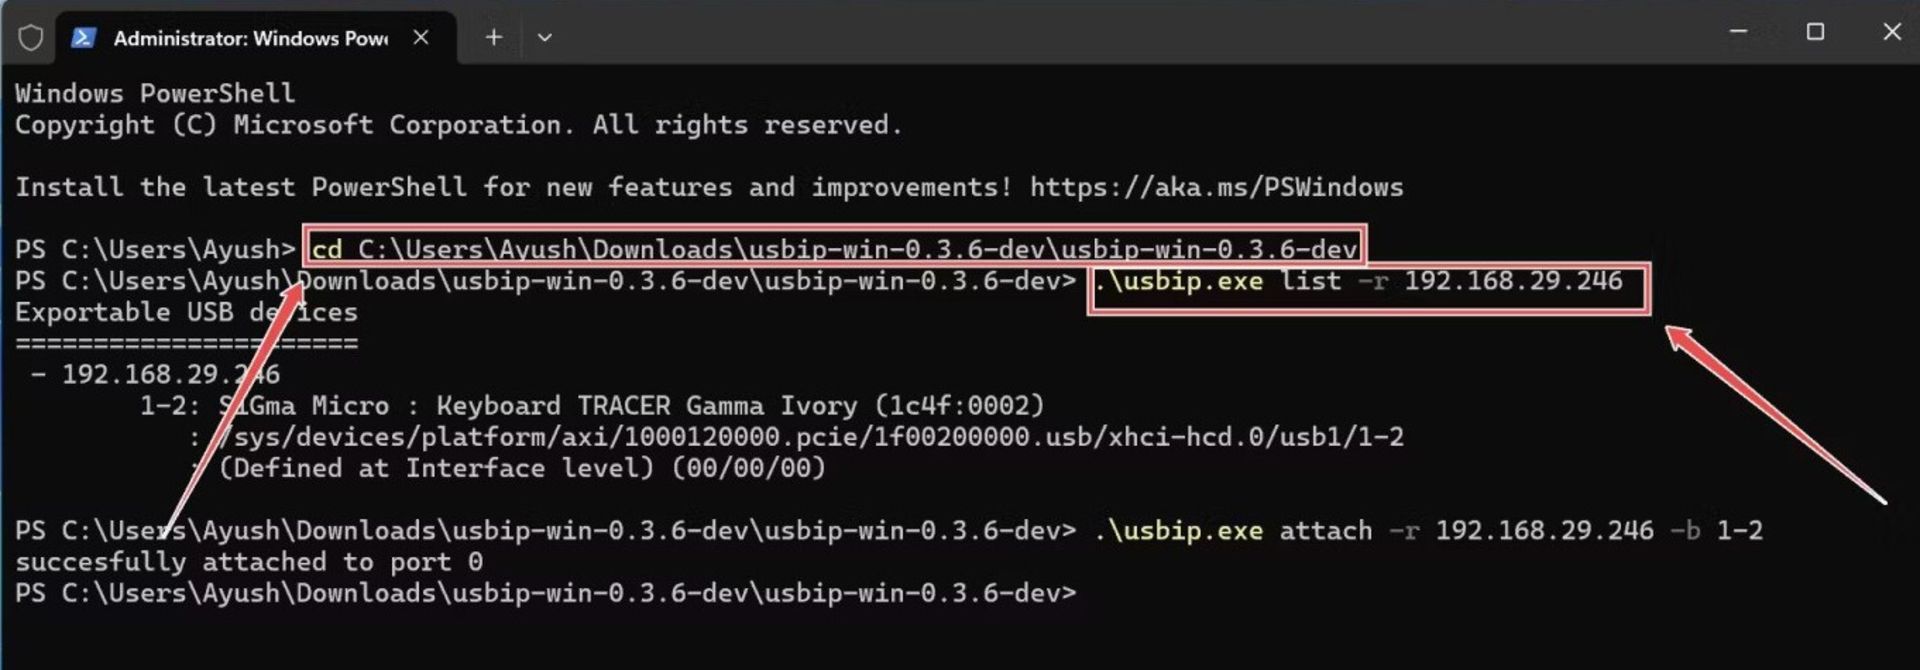
You can use network scanning software like Nmap to check the IP address of your Raspberry Pi server. Linux or WSL users can use these commands by removing the \. or exe extension. Use usbip in every step.
- Find the IP address of the device you want to connect to the computer and run the attach command to connect it.
usbip.exe attach -r raspberry_pi_ip_address -b usb_id

If you followed the steps correctly, the terminal software will confirm that the USB device is connected to your computer. With this method, you can use the peripherals connected to the USB hub of the Raspberry Pi board.
It is recommended for beginners to use the first method as it is incredibly easy to set up and will be very useful as long as you only need one USB device at a time.
At the same time, the second method is considered a better option for Linux users. If you’re up for the challenge, try it on Windows too, just make sure to disable Test Mode as soon as you install the usbip.exe file, as it’s really unsafe for public use.


